


New article
Recently updated
Workbench User Access

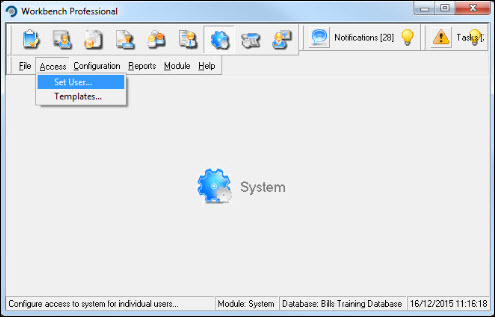
To determine who can perform specific functions within Workbench, the setting of user access allows each user to have their own customised menu structure. If groups of people perform the same tasks, a template facility makes people management easier, and is covered later in this article. In the System Manager module under the Access menu, select the [Set User...] menu item.
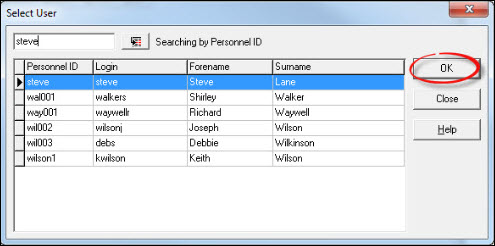
Select a member of personnel from the list and press [OK].
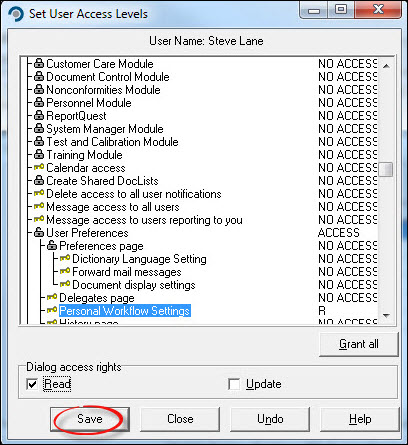
This will present a screen showing the tree of levels of Workbench menu items. The default is NO ACCESS. Press “Grant all” if access to all Modules and Menus is required.
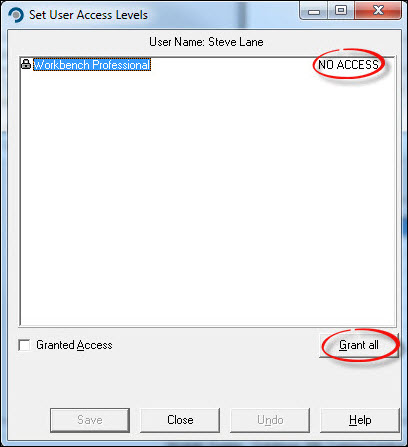
If selective access is required, 'double click' on the padlock icon  at the left-hand side and the display expands to: -
- The modules
- The header
- The menu
- The dialogue with options (Read, Create, Update, and Delete)
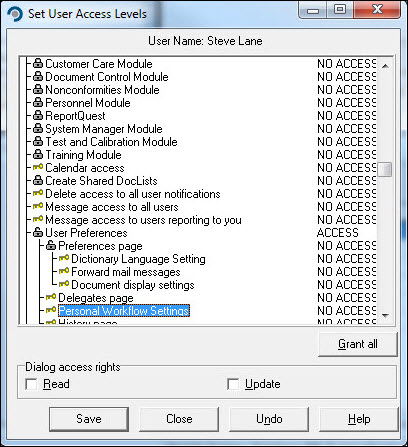
Expand each module by 'double clicking' on the padlock  , and select which menu items you wish the user to have. Permissions must be granted at the higher level before they can be granted at a lower level, so follow the tree structure until the Granted Access tick box becomes available. Where a padlock is showing, another level exists below it. The Key symbol
  shows the lowest level. Once the required access has been added, press [Save].
Repeat for other personnel.
For personnel that require the same access levels, consider creating an Access Template as a 'container' for the users. This cuts down the administrative task of assigning permissions as it is the template that permissions are assigned to, not individual users. From the [Access] menu select [Templates...].
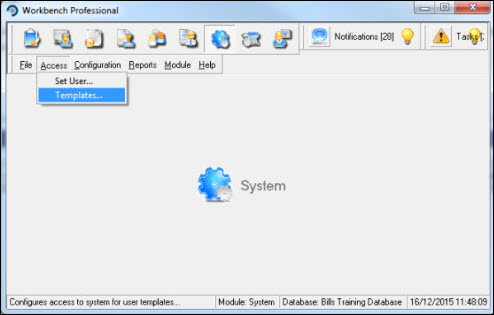
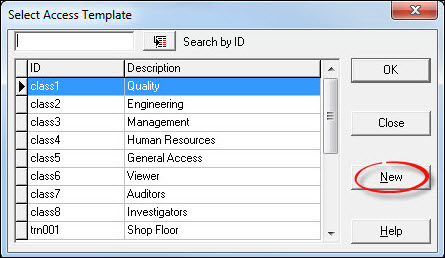
If the Access Template you require has not already been set up, press [New].
The ID and Name are mandatory fields. ID cannot be altered or used again, but the name of the template can be changed. Base On allows the template to be based on an existing one, therefore inheriting all of the access levels of the previous one. This can be useful if creating templates that are similar as it results in less time spent adding or removing options. To select staff to be part of the access template, highlight the name on the left (use the “shift” or “ctrl” keys to select more than one person), and use the double arrows in between the two lists to move them from left to right.
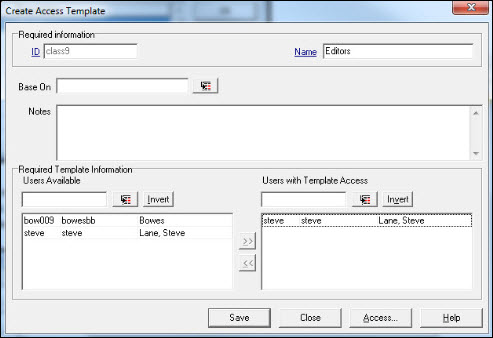
Each member of staff can be a member of only ONE access template. If they have INDIVIDUAL access rights, then they are not available for inclusion in a template. If you want to include somebody in a template, but their name does not appear on the list of names available in the left hand column, either they are a member of another template or have access rights granted to them individually. To make them available you must first remove whatever access level they have. If they have individual access, go to the [Set User] menu, select the users name from the list, double click, and make sure that [Workbench] is highlighted. At the bottom of the dialogue screen uncheck the Granted Access box.