


New article
Recently updated
Workbench Naming Conventions, Navigation and User Preferences

Workbench is a collection of software modules designed to assist in the implementation and smooth operation of day-to-day management control. The overall system consists of the following modules:-
• Audits
• Nonconformities
• ReportQuest *
• Customer Care
• Test and Calibration
• Document Control
• Training
*ReportQuest is different in concept to the other six modules; it is a ‘plug-in’ rather than a ‘stand-alone’ module. It integrates with any or all other modules and utilises the information stored in them.
Each module (apart from ReportQuest) has been carefully designed to be a powerful individual management aid and for many organisations, it may be entirely appropriate to run any on a ‘stand-alone’ basis. There is, however, considerable integration between the different modules and this could offer many benefits to organisations running a comprehensive quality or other compliance management system. Any company that wishes to adopt a ‘phased’ implementation can add modules to the system as and when required.
Each module has its own electronic reference manual and on-screen Help system but these guides should not be seen as a substitute for professional advice and training. Workbench is designed to be extremely easy to use in its daily operation but the preliminary setting up of a module can be relatively complex.
Conventions used in Workbench
Tab Key
This key is used to move from field to field. As you Tab from field to field, you will know where you are by the flashing cursor or the entry in the field being highlighted in reverse colours. If the field is a button then a dotted halo appears around the button label.
Esc Key
The Escape key allows you to close from any of the screens in Workbench.
Alt Key
This key, used in conjunction with the underlined letter in the menu, or where a selection is requested, will perform the action or allow further choices to be made.
Mandatory Fields
Mandatory fields are those fields where you must enter information before you can complete the specific task. The labels (Titles) to these fields are highlighted in blue and are underlined.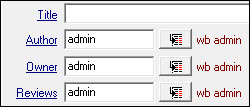
Search Buttons
Search buttons  allow you to filter search within a list of specific data. By typing some or all of the information you require in the box, and using either the mouse or “F” keys, you can narrow the range of information presented to the first instance of required search choice. Use the “Right Mouse Click” to reveal the choices available.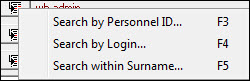
Calendar Fields
Clicking on this icon  presents a calendar representing the current month with the current date highlighted. Select the required date by using the month and year symbols at the bottom of this calendar screen and then selecting the tick symbol to accept.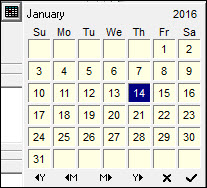
Module Icons
The following icons appear across the top of the screen. Simply select the icon with the mouse and the screen display will change to the selected module.
Hovering the cursor over an icon reveals the module name.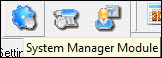
Right Mouse Button
Using the right mouse button will bring up a floating dialogue or action button box in many areas of Workbench. For example the screenshot below shows the menu which appears whenever you right mouse click on the Workbench desktop, allowing you to switch off or on any of the menu bars at the top of the screen.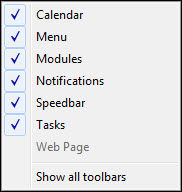
Speed Buttons
In each of the modules, a number of speed buttons enable common actions to be accessed quickly. One mouse click on the speed button will open the dialogue for that action. Hovering the pointer over a button reveals the what the button does.
Tasks & Notification Buttons
Alongside the Module and Menu icons, are two communication icons called Tasks and Notifications. Workbench generates tasks and sends them to an individual user to perform. These tasks will appear in the user’s task box and new tasks will be indicated by a “light bulb” symbol, which will change to yellow for new tasks. Notifications are messages sent to the user and, unlike Tasks, require no user intervention. Outstanding Tasks & Notifications will show a number count next to each icon - in the case of the screenshot below, 31 Notifications and 293 Tasks.
Shortcut Keys
As with all Windows applications there are a number of key combinations which perform tasks as alternatives to using the mouse or drop down menu items.
Common among these the following can be used within Workbench:-
- Ctrl+A - selects all
- Ctrl+C – copies highlighted text to clipboard
- Ctrl+V – pastes data from clipboard to application
Logging on to Workbench
Select the Workbench Icon from the Desktop, Task Bar or Program Group and double click to open the program.
The “Log on to Workbench Professional” screen enables you to select the database you wish to work with and for you to login to that database. Whether you are using the Workbench Login, or using the Windows Authentication, you will first have to be set up as a registered Workbench user.
Select a database from the Dropdown list.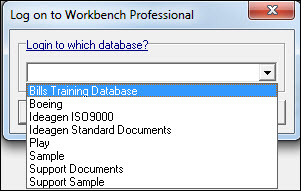
Enter your user name into the Login box and password into the Password box. Note that each database has a default “super user” account that is used to create the initial Workbench administrator account (from which all other accounts should be created). The super user account should not be used for day to day management of the system as this will not provide an accurate audit trail of users carrying out tasks in Workbench.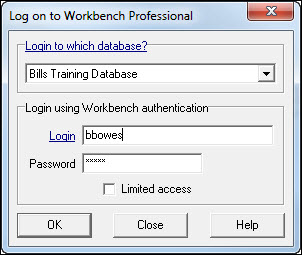
The presentation of the Log on Dialogue Box differs depending on whether your system is configured to use Windows Authentication logins or not. If your system is set to use Windows Authentication, the screen will ask you to select a database, but will tell you that you are using Windows Login and Password to access Workbench. Depending on the configuration, you may be asked for a password to login in at this point as well, but you will use the same password as used to log in to your network account.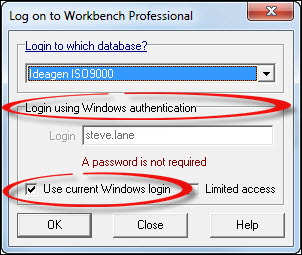
Workbench will use a full System license, allowing a user access to all areas of Workbench they have been given access to by the System Administrator. By ticking the Limited Access box, a Workgroup license is invoked (if available) which restricts users from accessing any of the module menu items, apart from the File menu (where issued documents can be viewed from), Task & Notifications buttons and the Workbench Calendar. In addition, if external e-mail is implemented, responding via an e-mail message also uses a Workgroup license.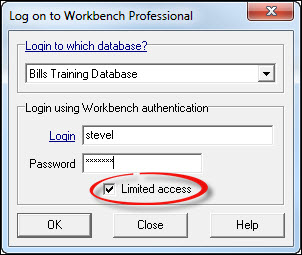
Navigation around Workbench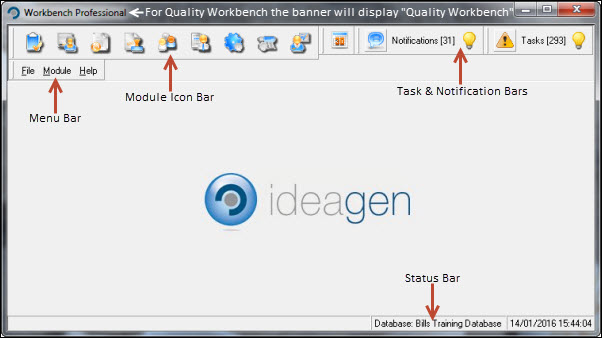
The Module, Menu, Calendar, Task and Notification Bars can be rearranged by grabbing the 'tab' on the left of each bar and dragging to a new location.
Task Bar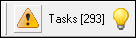
Workbench generates tasks and sends them to an individual user to perform. These tasks will appear in the user’s task box. Each task will have a light bulb, either yellow or grey to denote “read” or “unread”.
The status of each message will also be shown with an icon.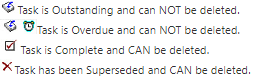
To help you navigate through Workbench you will need to become familiar with the drop down menus.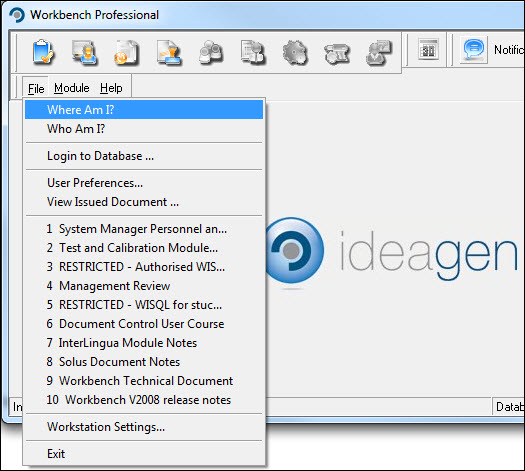
Select [File] menu item and view the options available.
- [Where Am I?] tells you which database you are currently in.
- [Who Am I?] tells you your login ID and what access rights you have, either as part of a template or if access is granted as an individual.
- [Login to Database] allows you to select a different database, allowing you to login if you are registered to use that database.
- [User Preferences] appears only if you have been given access to that menu item. In User Preferences you can change your password, set your screen display preferences, nominate delegates and determine your own local workflow settings for your own tasks and notifications as well as test your e-mail account. Access rights can be also be set individually to most of the functions within this area.
- [View Issued Documents] allows you to view those documents that you have the rights to view and that have an Issued status.
- [Workstation Settings] allows you to personalize the startup options for your particular workstation, by pre-defining which database is selected, what your login details are, which server you can connect to and which language dictionary you want to use. Once selected here, this defines what parameters are selected as you log on to Workbench. This area will always be available to the end user, but some of the elements, such as the language dictionaries, may be set using the configuration setup on the main server, and may therefore be read only.
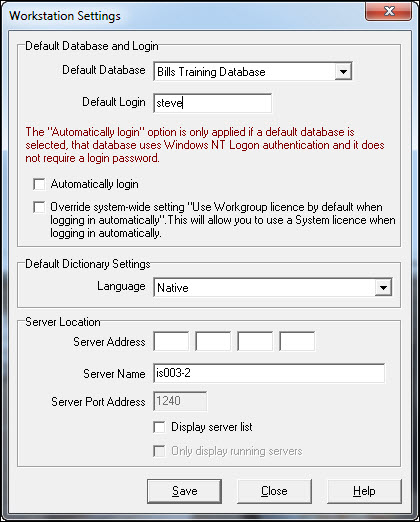
The Automatically Login option will depend on the database settings set on the server AND if this area has been licensed. By default, logging on using Windows Authentication will use a System license. A system setting is available to allow users to set Workbench to default to using a Limited Access, or Workgroup license.
User Preferences
In the User Preferences menu item there are five tabbed pages available to all users individually. Many of the settings will inherit the default settings as defined in the System Manager Module under the New User Settings found in the Workflow Configuration Centre. These settings will apply to New Users entered into Workbench after these default settings have been created, and changes can be made by the individuals if the user permissions allow. Access to the User Preferences menu item is controlled on an individual user or group basis under the System Manager Access settings.
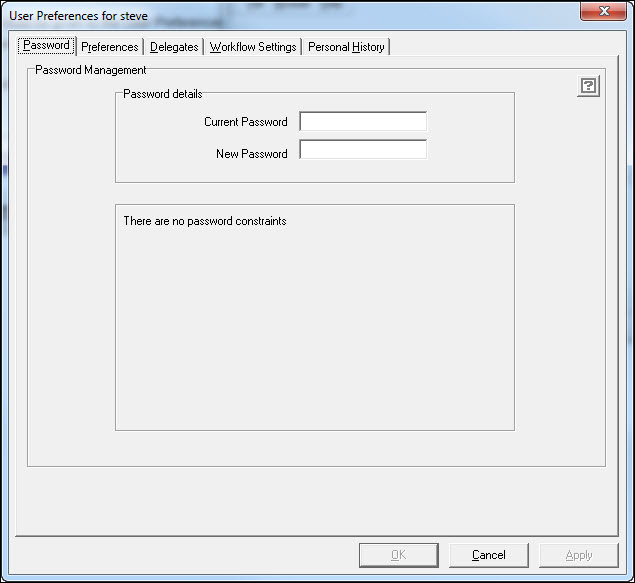
Password
For users to be able to change their Password, access must be given to the User Preferences menu item. This will then show the Password Tab where they can enter a new password. Any constraints established in the System Manager module will be shown under the Password Details box.
Password Constraints are NOT available in Quality Workbench.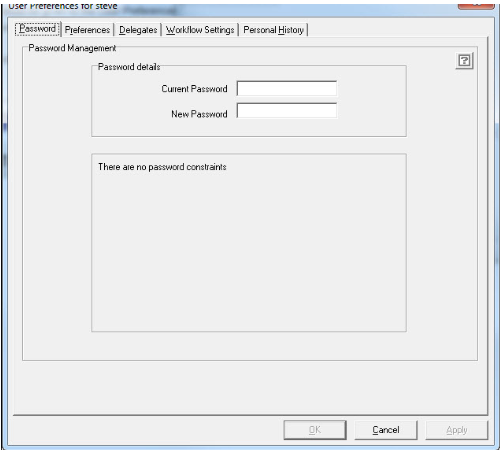
Access to the "Preferences", "Delegates", "Workflow Settings" and "Personnel History" tabs can be limited through the access settings, found in the System Manager [Access] menu, and is controlled as part of user permissions settings.
Preferences
If allowed, a user can test his own e-mail address, change the database language he uses for that database and change the way his document search lists are displayed.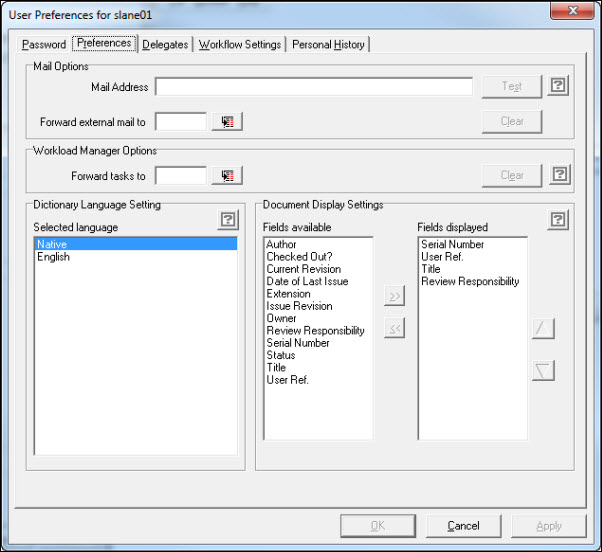
Forward external mail to allows a user to nominate another user to receive ALL Tasks and Notifications that would be sent by the external e-mail system (if external e-mail is switched on). All the tasks will be redirected to the e-mail box of the nominated user who will be able to respond to them, i.e. approve document, and sign for them as “on behalf of” using their own password. Whenever an action is carried out as a result of forward messaging, its corresponding history entry is suffixed with an asterisk (*). Right-clicking on theses entries will then provide details of the user who undertook the action - for an example of this see [Document Attributes] [History] in the Document Control module.
NB. If mail attachments are sent via IntraVista Professional and are forwarded on to another user who subsequently carries out the action, the history entry will show that the action was carried out 'on behalf of' the original user.
If delegates are applied, then only those users who are defined as delegates will be available to select for forwarding external e-mail. Mail forwarding will stay in force as long as another users name is in the Forward external mail to box. Remove the name from the box using the [Clear] button to stop external messages being sent to the nominated user.
It is also possible to re-direct messages to a nominated delegate using the Workload Manager functionality. This works in the same way that the forward e-mails works. Whenever an action is carried out as a result of forward messaging, its corresponding history entry is suffixed with an asterisk (*). Right-clicking on theses entries will then provide details of the user who undertook the action.
Delegates
If access is allowed, a user may nominate his own list of delegates, i.e. people who can act on his behalf. (This is a licensable area for Quality Workbench Users).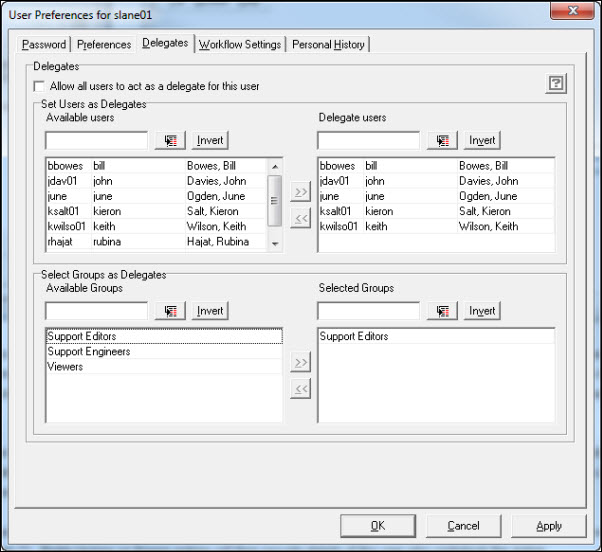
Workflow Settings
Where the System Administrator has granted access, a user may also change certain workflow settings inherited from the default settings.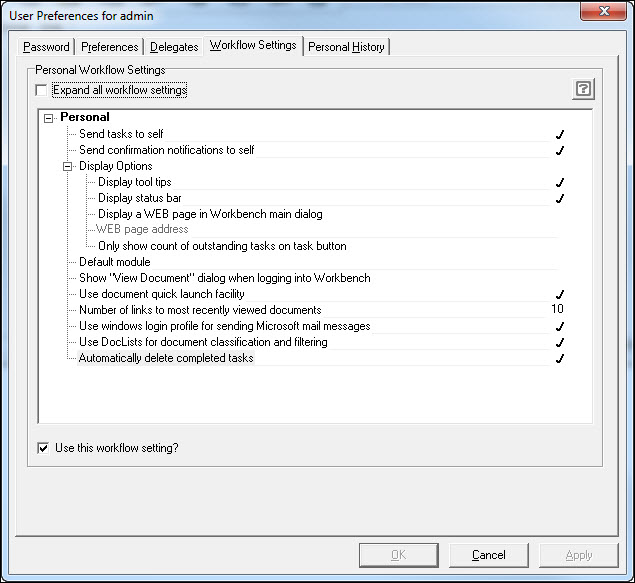
Each user can select to use the Quick Launch facility, which shows the last documents (up to 10) viewed in the file menu. It is also possible to replace the default background screen, which shows the module name, with a defined Website. This can be anything from the company default Intranet site, the IntraVista search page, or any other web site. In the Workflow settings, under Display Options, select Display Web page in Workbench main dialogue, and the type the URL in the Web Page Address dialogue. Only show count of outstanding tasks on task button allows the control of the number being displayed in the [Tasks] button bar. With this selected, only the number of outstanding tasks, those still to be completed, will be shown next to the Tasks button. When a user logs in to Workbench they can decide, not only which module the system opens up in, but can also have the "View Document" window open automatically by enabling the Show "View Document" dialog when logging into Workbench option.