New article
Recently updated
Setting up the Training Module

Before using any of the Training module functionality an amount of setting up must be completed.
Personnel
The majority of the information for personnel will already be held in the Personnel module, and the Training module utilises this information. Selecting the member of personnel from the list allows for filtering by those who have attended courses or have certain skills or qualifications.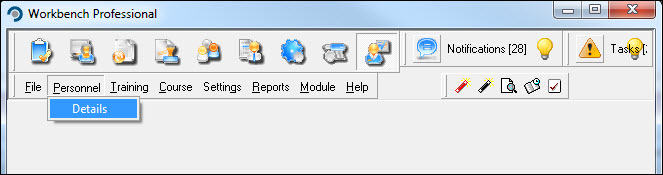
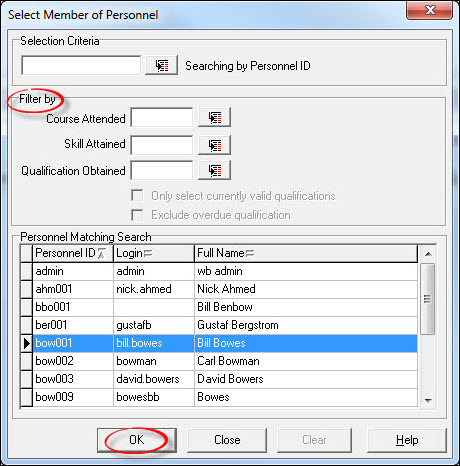
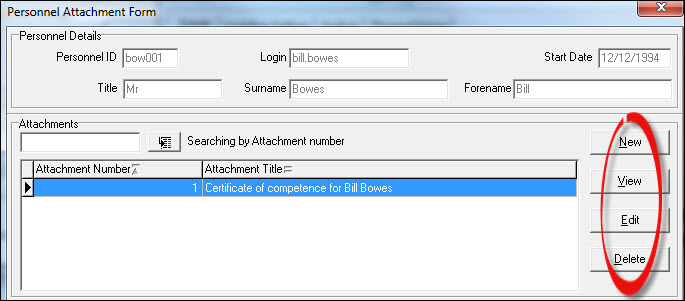
Press [OK] when filtering and selection is complete. It is possible to add/remove any scanned certificates gained from here via the [Attachments] button.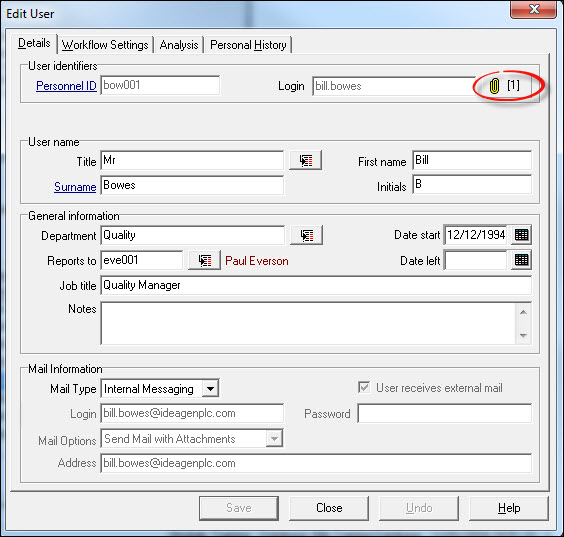
Amend where necessary and [Save]. [Close] the "Edit User" and "Select Member of Personnel"window and return to the Workbench Desktop.
Skills
Basic information regarding the skills required by an individual to perform his or her tasks efficiently will need to be entered. This is carried out from the [Setting] [Skill] menu option.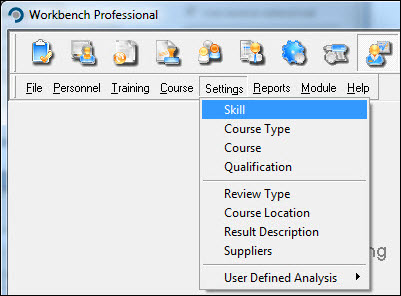
If the Skill does not exist in the pick list, press [New].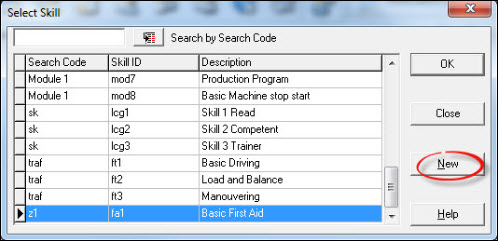
Define the job/function, and then break that down into the individual skills required to perform that function. These will be the skills to be entered here. The ID code, (which is mandatory, along with Description) needs careful consideration. Press [Save] when complete. Repeat the process to add more skills and [Close] when complete.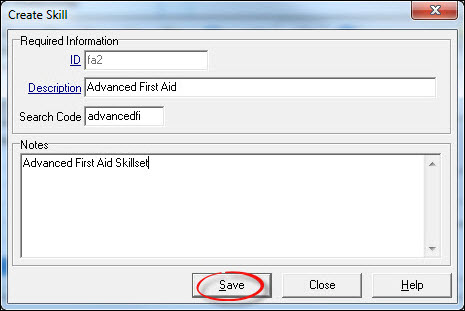
Remember that many skills will be part of a number of different job functions and therefore need to be entered only once. Skills can be used as the basic building blocks of the Skills and Qualifications Matrix and a Qualification will usually consist of a number of skills attained accumulatively to represent the Qualification. Each course that an employee attends will “credit” his record with all the skills the course has attached to it. Some serious consideration needs to be applied as to how this will all fit together. The acquisition of skills can be used to build up to a qualification, or skills can be accumulated on their own.
Qualifications
Many jobs will require that a qualification be gained before the employee can undertake a job without supervision. These qualifications can be gained by acquiring a number of “on the job” skills. Other qualifications can be gained (e.g. GCSE’s) which will add to the record for that individual. Many official qualifications are needed for auxiliary duties, (e.g. First Aid) and need to be updated or “refreshed” to ensure the person is suitably up to date with the latest techniques.
There are three “Types” of qualifications in the training module:
• One that is gained for life e.g. degree, diploma, GCSE etc.
• One that remains valid for a fixed length of time only.
• One that remains valid for a fixed period but can be refreshed at regular intervals.
These need to be entered from the [Settings] [Qualifications] menu option. If the Qualification does not exist in the pick list, press [New].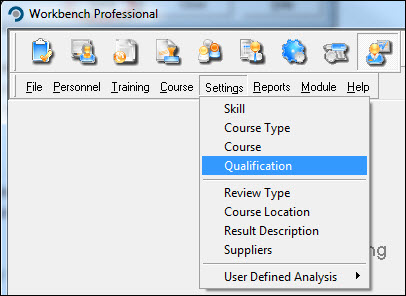
The ID and description of the Qualification are mandatory fields, and the option to make the qualification a refreshable qualification should be identified at this stage. Typically there are any number of types of qualifications, including a refreshable course (First Aid, or Fork Lift Truck etc.) and all types can be created within Workbench such as;
• Fork Lift Truck Drivers Certificate
• NVQ Business Administration
• Internal Auditor
• Lead Auditor
• First Aid at Work Certificate
• Health and Hygiene Certificate
• External Field Engineer
• RSA 1
• RSA 2
Press [Save] when the details have been entered and add further Qualifications if required. Alternatively [Close] to exit.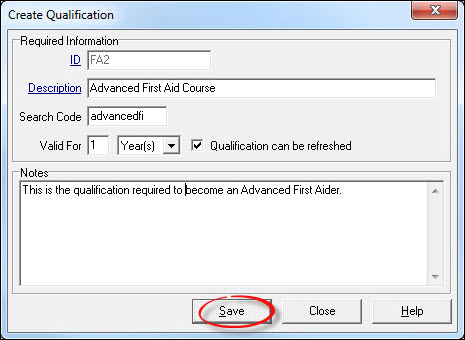
Courses & Course Types
Courses may be of differing types, such as Health and Safety, Maintenance, Administration etc. Courses of a particular type can be grouped together under the Course Type heading. These types are created in the same way that skills and qualifications are created. Typical Course Types could include the following:
• Administration
• Financial
• Fork Lift Truck Basic
• First Aid
• Health and Safety
• Follow up
• Quality
• Maintenance
• Secretarial
• Basic IT Support
Select [Settings] [Course Type] from the menu options. If the Course Type does not exist in the pick list, press [New].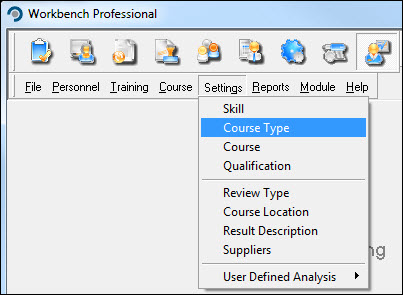
Enter a Description and add notes if required. [Save] when complete and repeat for further Course Types. [Close] to exit from the "Create Course Type" window and return to the Workbench Desktop.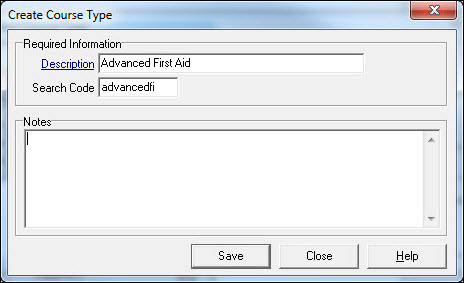
Courses
To obtain skills and qualifications an individual must normally attend a course. Courses are of three types;
• Ones that require attendance, but do not give any qualification
• Ones that give a qualification on satisfactory completion of the course
• One that refreshes a previously gained qualification
Details of the courses, and any pre-requisites for prior training are set up in the [Settings] [Course] menu item, together with any skills that will be gained by attending and completing the course.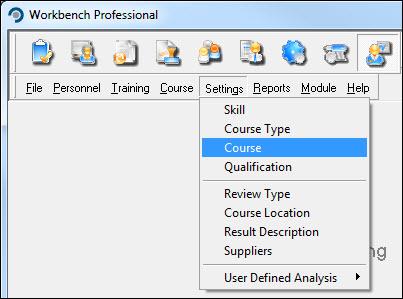
If the Course does not exist in the pick list, press [New]. Proceed to enter the details paying particular attention to the ID and Name fields. Prequisites, Skills and Documents can be selected from the appropriate tabs.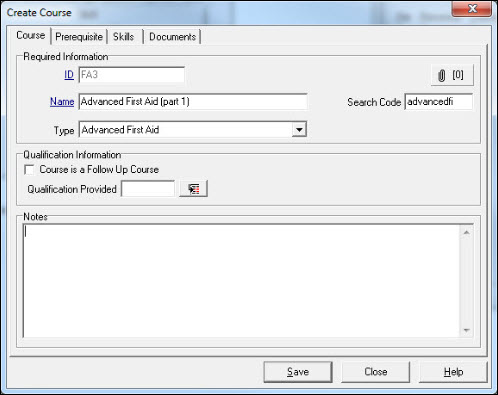
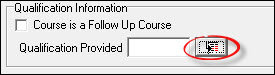
Where a course will give a qualification, enter this in the Qualification Provided field, using the search button.
Locate the Qualification and [OK].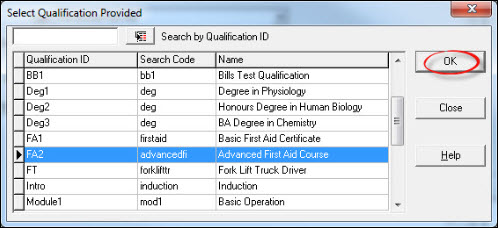
[Save] when complete and repeat to create further Courses. [Close] to exit from the "Create Course" window and return to the Workbench Desktop.
Prerequisites
It is sometimes necessary that an individual will need to have undergone some prior training or attended a particular course before they are able to undertake the new course. This can be recorded in the prerequisites tab. Here, define what courses, qualifications and skills the trainee must already have acquired before attending this course.
NB. Workbench does not restrict you from entering people who have not attended the relevant prerequisite courses...it is there as a prompt to remind you.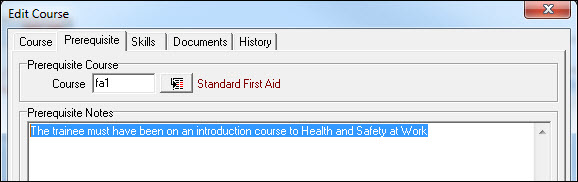
Skills
The Skills tab identifies which skills the trainee will acquire by attending this course. Select the [Skills] tab from "Create Course" window and, from the list of available skills on the left, use the arrow keys in the centre of the screen move the required skills to the right (Skills Selected section). Skills gained by completing the course can be identified when setting up the course. Press [Save].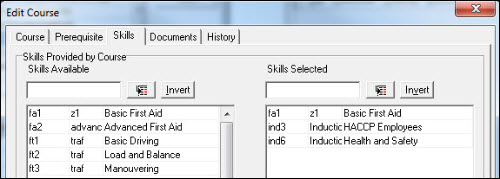
Documents
Any documents associated with the training courses can be entered or attached to the course, so that when the document is updated, a training course can be scheduled before the document can be re-issued.The attendees for the training course can include the distribution list for the document. Additional attendees can be added at the time the course is scheduled.
A course can be scheduled when the document is fully approved and about to be issued. Use of the [Add] and [Remove] buttons allow documents to be added or removed from the course.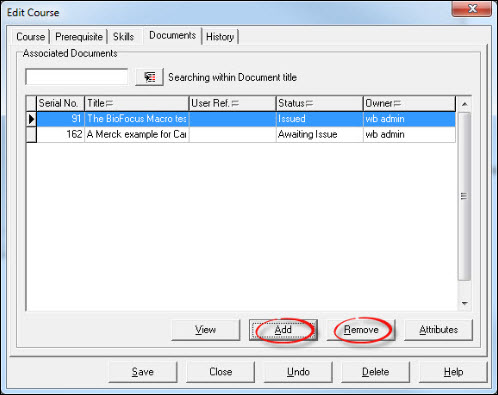
There are several other settings that require consideration before scheduling courses.
Review Types
Review types define the way training requirements are identified for members of staff. These can be any number of ways, Annual Review, Management Review, Staff Appraisal, Self Development etc. To set up a Review Type select [Settings] [Review Type] from the menu. Select [New] and, as with other areas, complete the mandatory (blue, underlined) fields. Add explanatory notes where you feel necessary. [Save] the Type and repeat if further Types are required. [Close] when finished to return to the Workbench desktop.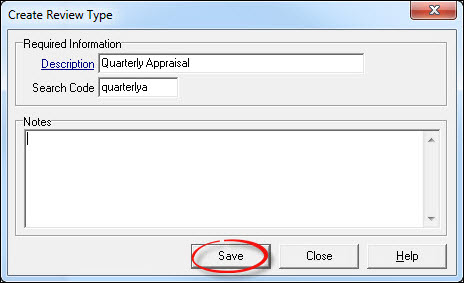
Course Location
This is a mechanism that identifies the areas where courses may be held. For example;
• Do you have purpose built training rooms?
• Do you utilize external trainers?
• Do people train in situ at their workstations? For example Supplier premises, local TEC, local college, Training room, workstation.
Course Locations are created from the [Settings] [Course Location] menu item.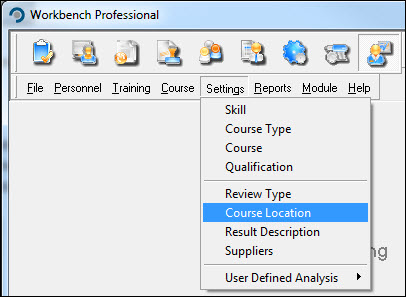
Press [New] and proceed to enter a description and notes (if required). [Save] the Course Location and repeat if further locations are required. [Close] when finished to return to the Workbench desktop.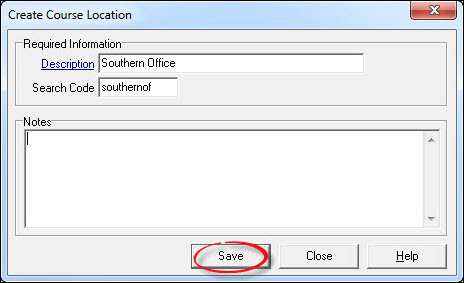
Suppliers
If you have not already entered any suppliers via the Nonconformity or Test & Calibration Modules (your system may not have these modules licensed) you will need to enter information into the supplier records in the Training Module, should you use external companies to deliver training. Suppliers are created from the [Settings] [Suppliers] menu item.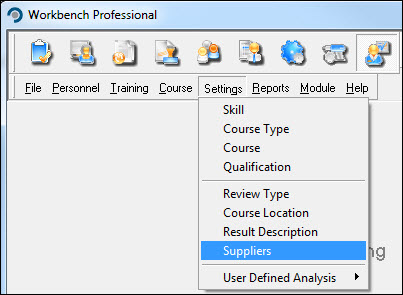
Press [New] and proceed to enter details paying particular attention to Supplier ID and Name. [Save] the record and repeat if further Suppliers are required. [Close] when finished to return to the Workbench desktop.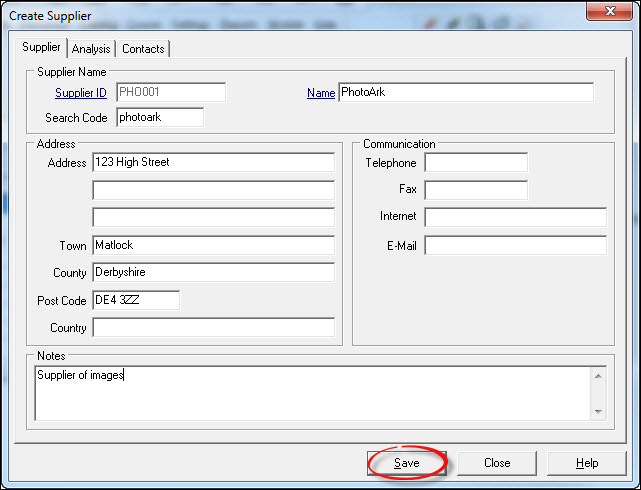
Result Description
You may want to create course result descriptions using your own terminology. Course results have 3 standard terms, Pass, Fail and Reserve Judgment, but you may create more. This is carried out from the [Settings] [Result Description] menu item.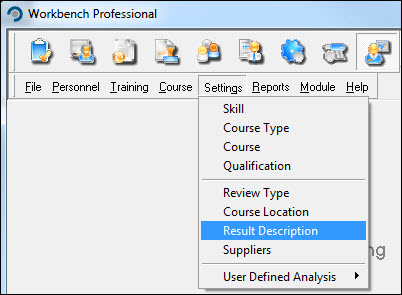
Press [New] and proceed to enter details paying particular attention to the Description. Add notes if required [Save] the record and repeat if further Result Descriptions are required. [Close] when finished to return to the Workbench desktop.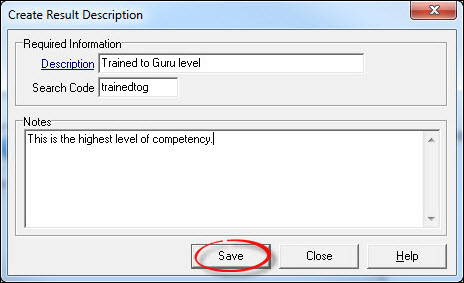
Adding an attachment to a Course
A large amount of information is generated externally with regards to training courses and the attendees. This will be in the form of course notes, directions to venues and certificates of competence or attendance. This information can be added to a Course using the Attachments capability. Select [Settings] [Course] from the menu.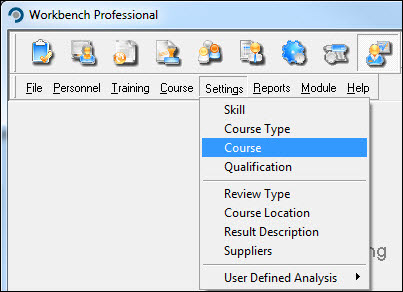
From the list of courses presented select the appropriate one and [OK]. The Edit Course window opens - press the attachment button  . Proceed to add, edit or delete an attachment using the buttons on the right of the window and [Save] the changes. [Close] to return to the Workbench Desktop.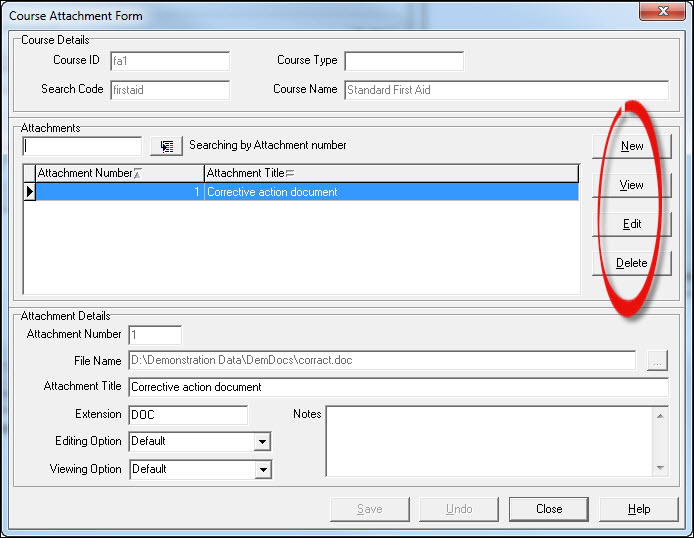
Training Reviews
Training reviews are carried out using the [Identify Training Requirements] Wizard, which can be found under the [Training] menu header. Reviews are set against individual staff members. It is a step-by-step process. Once the Wizard has opened, some notes provide guidance. Select [Next].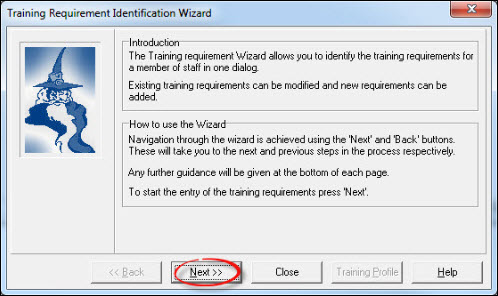
Select the Member of Staff and the Review Type. Add any other notes as required, describing the review, the scope and the expected achievements.
Press [Next].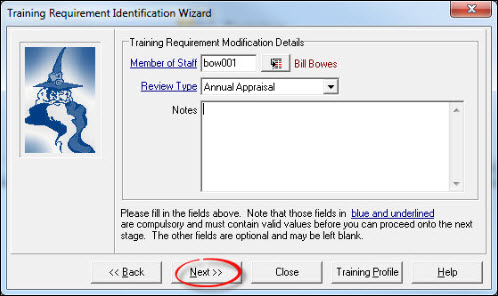
The next screen shows any courses that the staff member may be booked on, and where attendance of other courses can be allocated (by pressing the [New] button. If no course is highlighted at this stage, move forward using the [Next] button to identify the skill required.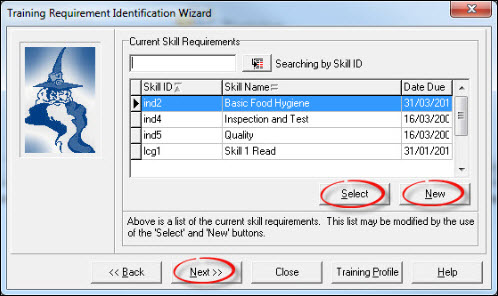
Once again, the member of staff may already have the requirement to achieve certain skills, identified from a previous review. Add or modify this list by adding new skills requirements (using the [New] button). Or use the [Select] button after highlighting Skill and select from the list. Enter the date by which the skill is to be obtained, usually the date a course has been set, press [Save] and select [Next].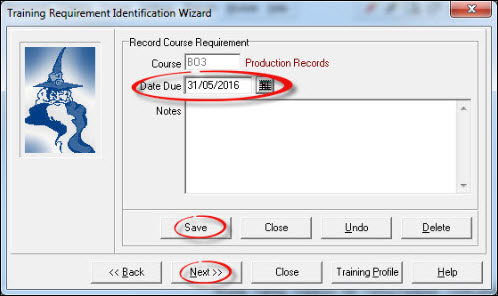
This will return you to the "Current Qualification Requirements" Screen. Press [Next] and [Finish] from the summary page.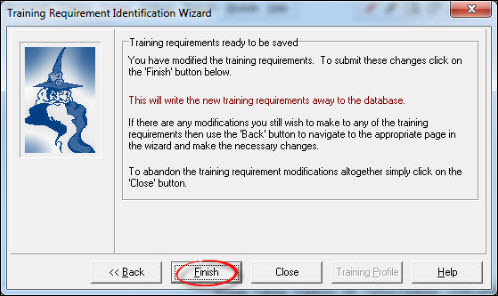
Planning and scheduling courses
The next stage is to bring the training requirements information gathered as the result of the review together with the courses, so that a course can be scheduled to deliver the training to fulfill the requirements. Schedule a course from the courses available by selecting [Schedule Course] from the [Course] menu. Note that course scheduling can also be done at the point of issuing a document.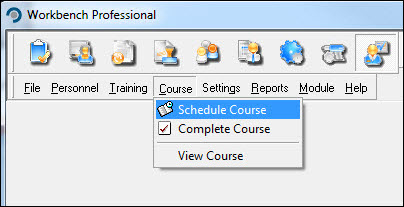
This will give a list of the current courses scheduled. From this screen select the [New] button.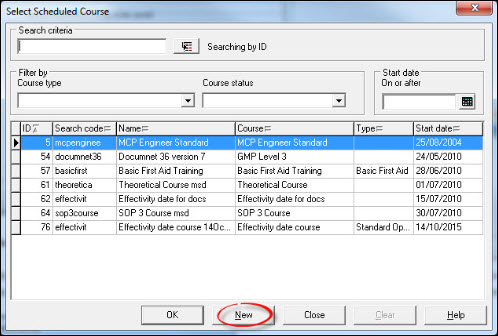
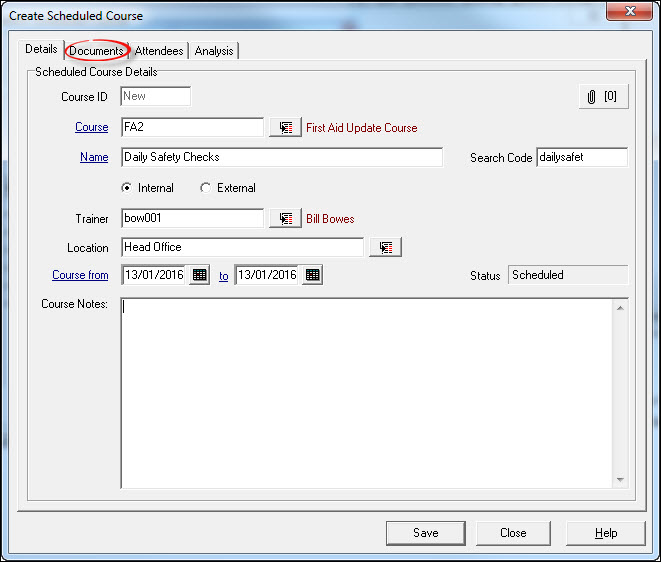
From the "Create Scheduled Course" window, select the course from the Course search button  . The name of the course will be that of the scheduled template course, but you are able to amend the name where necessary. Define the name of the trainer or organization if the course is external, the location where the course will be held, and the dates on which the course will be held. Selecting the [Documents] tab will show which documents are already associated with this course.
From the [Attendees] tab select the individuals you wish to attend this course.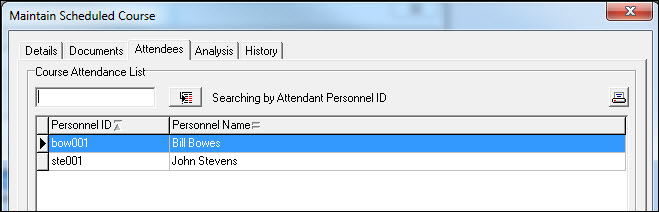
Selecting the [Define] button will allow you to define who will need to attend the course by virtue of having been identified through the training requirements wizard, being on a document distribution list or having a refreshable qualification.
If, during previous reviews people have been identified as needing the sort of training provided by this course, then those people identified as having a training requirement (either for the skills or qualifications the course provides), will be highlighted under the relevant heading. Either, select the individuals one at a time, or tick Select all identified personnel and groups to ensure that all relevant people are included on the course. Once you have completed your selection and closed the screen (via the [Done] button) you will be shown the total selection. By selecting the Select all identified personnel and groups the system will also select the people who are on the distribution list of the documents associated with the training course.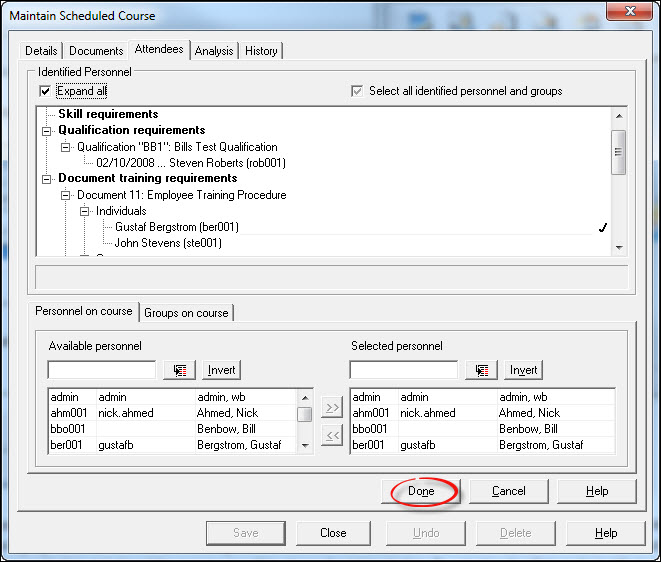
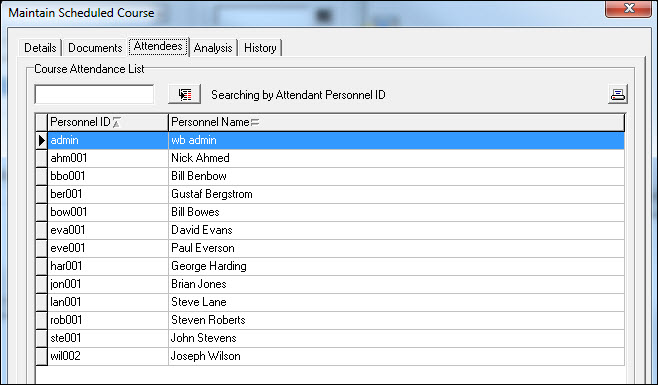
The course can be scheduled on its own or as the result of a document being marked for Issue. Press [Save] and [Close] to complete the scheduling.
Docu-centric training courses
Training courses can be associated with particular documents to identify those people who need to be trained in the use of a document. This is of particular importance to those organizations who need to show that all relevant users (identified by being members of a document distribution list), have attended a training course where the details in the updated document have been explained, and those users are trained in its use.
Upon a document becoming available for issue (fully approved) it will be possible to associate this version of the document with a training course. This is carried out from the "Issue Document" window, by selecting the [Courses] tab.
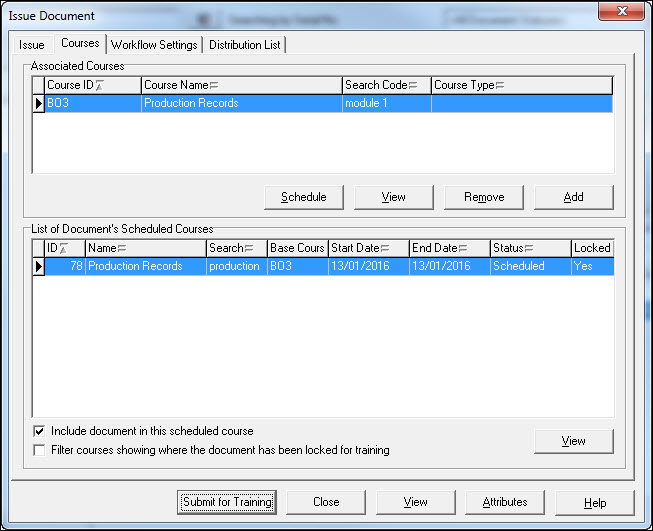
The top part of the dialog will show the list of Associated Courses already identified as suitable for training against the document.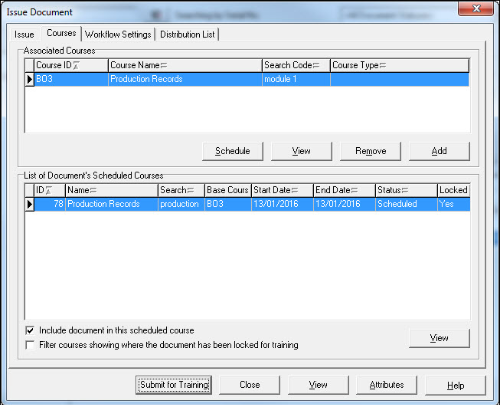
If the document already has scheduled courses associated with it, they will be listed in the bottom part of the dialog under List of Document’s Scheduled Courses. If the document is already included in a scheduled course, a Yes will appear in the Locked column and the Issue button’s caption will change to [Submit for Training]. You may include the document in more than one scheduled course as long as the course status is ‘Scheduled’ (not 'Complete' or 'In Progress'). To include it on more than one course, highlight the course on which the document is to be locked and click the Include document in this scheduled course check box. The Locked column now shows Yes for this scheduled course.
In the same way, the document can be ‘unlocked’ from a scheduled course by de-selecting the Include document in scheduled course check box.
To create a new scheduled course for this document, click the [Schedule] button.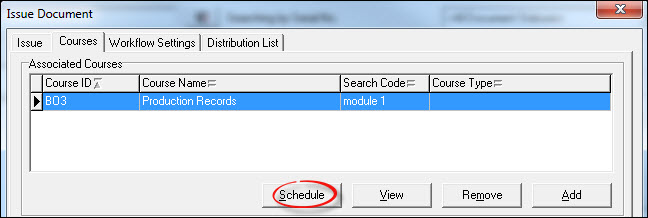
The "Create Scheduled Course" window will be invoked, allowing you to enter the necessary details for a new scheduled course using the associated base course. Creating a scheduled course from this dialog will cause the document to be marked automatically as 'Locked for training'. Press [Save] to save the new scheduled course.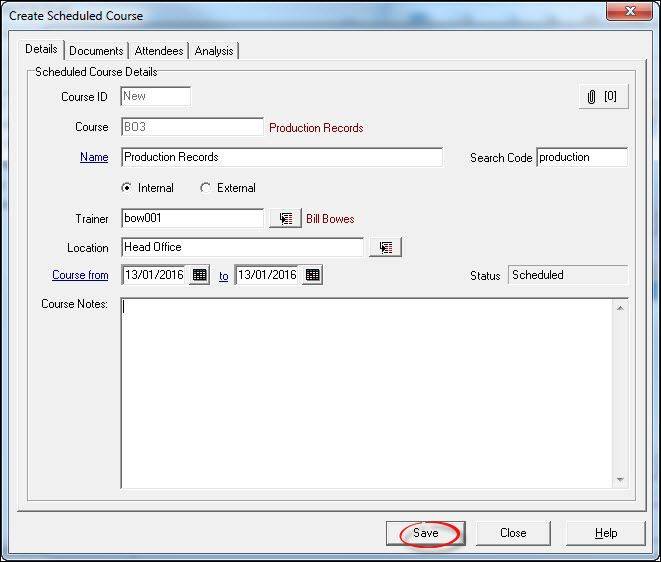
NB. The document must be locked on at least one scheduled course before the document may be 'submitted for training’.
The additional check box Filter courses showing where document has been locked for training allows the scheduled course grid to be filtered, showing only courses on which this document has been locked. If the check box is not checked, all scheduled courses associated with the document will be displayed. If you do not have Read access to the [Schedule Course] dialogue in the Training module, but you do have Create rights, you will be able to schedule a course and submit it for training but you will not be able to see details of the scheduled course(s) once this is done.
If the document has associated courses, and you attempt to issue it without either scheduling a course or including the document on an existing scheduled course, the following warning message will be displayed. 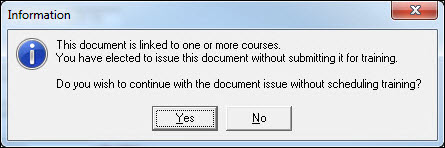
If a course has been scheduled or the document has been included in an existing scheduled course, the [Issue] button caption will change from 'Issue' to 'Submit for Training'. Either option will result in the document being marked as ‘Undergoing training’. This will lock the document and prevent it from being issued and distributed until the scheduled course(s) has been completed. The [General] page of the Document Attributes dialog will display “This document is undergoing training” in red type beneath the document status. Once the course has been completed, the document is then issued and distributed to the relevant personnel along with all the appropriate tasks and/or notifications.
NB. The document will only be automatically issued on completion of the training if it has been fully approved and is awaiting issue at the time of course completion. If this is not the case, the 'Undergoing training' flag is removed without actually issuing the document.
If the document is locked on more than one course, all courses must be complete before the document can be unlocked and submitted for issue.
Task to attend courses
The attendees will be notified of the course and date via a Task, and the date of the course will be shown in the task box. Opening the task (double click on the highlighted task) will give the trainee a summary of the course.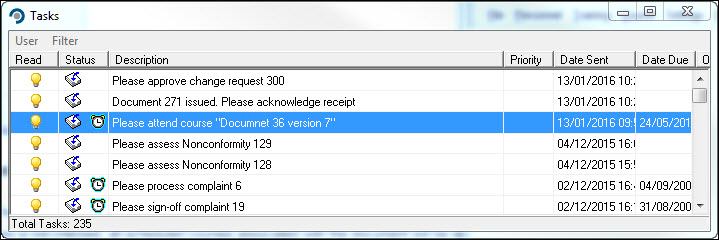
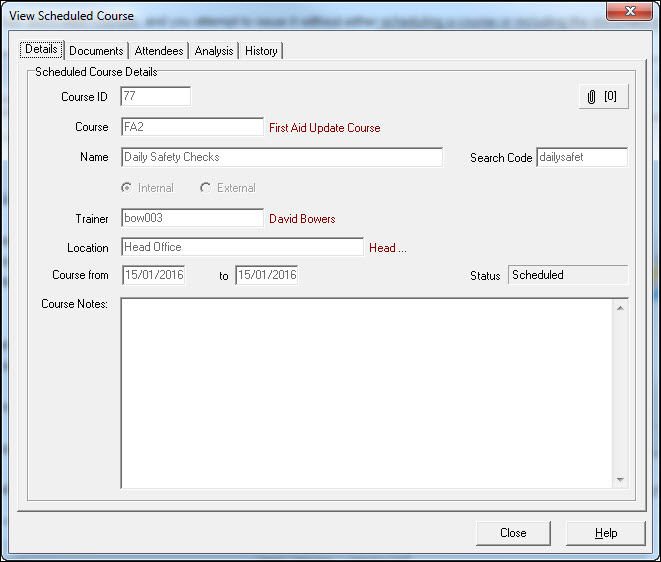
Anyone needing to view the course through their Task Box or e-mail will need at least read only access to the training module, and the [Course] [Schedule Course] menu item. In addition they will have access to view any attachments such as course details and venue directions.
Adding Attachments to a Course
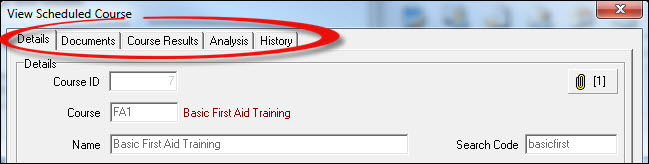
From the "View Scheduled Course" window, attachments can be added via the [Attachments]  button. A number next to the button signifies how many (if any) attachments are already associated with the course. Course notes, presentation documents, even maps and directions to the venue can be attached to this individual course.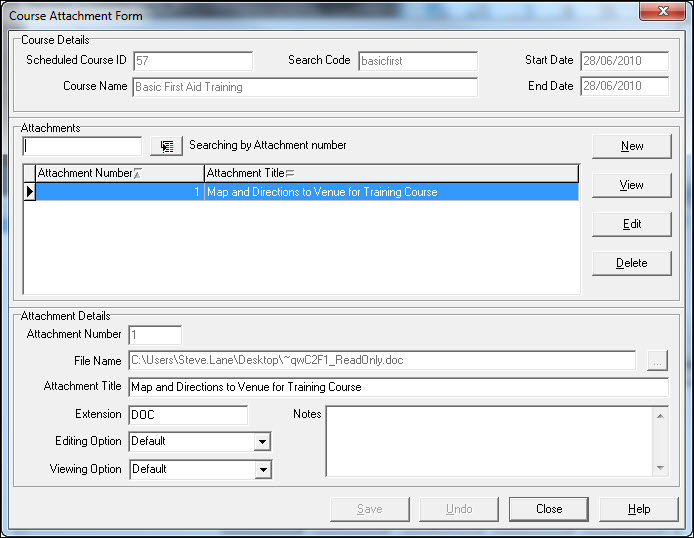
Completing a Course
Once a course has taken place then the course can be marked as completed by selecting the [Complete Course] menu item, from the [Course] menu.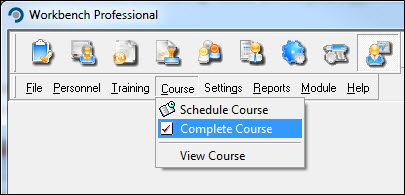
Individual results can be entered by selecting names from the list of attendees and entering more specific details.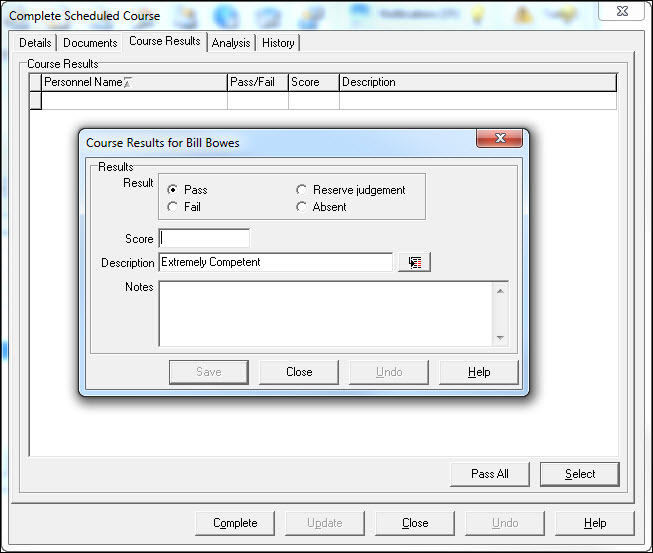
Once all of the required information has been added, the course can be marked as complete. 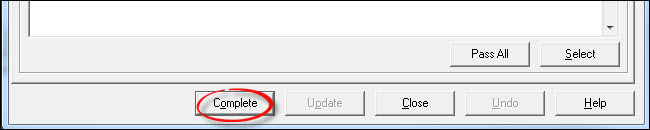
If a document was associated with the training course, and this was the only training course associated with this document, the document will be automatically issued.
Viewing a course and results
A course can then be viewed or reviewed as required, attendees results reviewed and checked, and document versions associated with the course identified. This is done from the [Course] [View Course] menu item.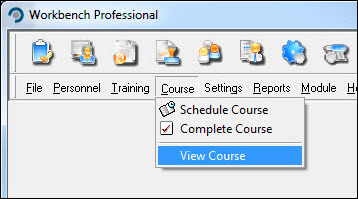
Locate the desired course from the list displayed and press [OK].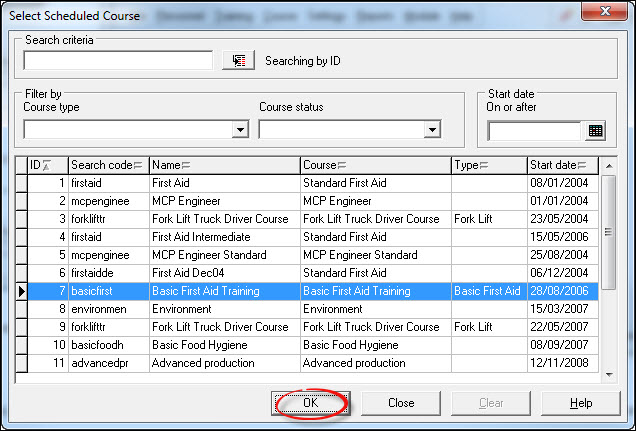
Review the information for each Tab and [Close] when finished.