


New article
Recently updated
Scheduling, Editing and Running an Audit

The scope of Audits Module
Audits Module in Workbench allows for the creation of Audits, either checklist or blank, scheduling those audits, running the audit and inputting the results and generation of Nonconformities as the result of variations to the normal procedure found during an audit. The module will assist in the generation of audit plans, with notification to all relevant people to either carry out the audit or informing auditees when the audit is due.
In order to run an Audit, a template must first be created (see KB "Setting up the Audit Module"). The audit is then based on this template and any future similar audits can be based on the same template. Audits can actually be run with very little information but it is possible to include everything required to build a complete detailed checklist audit.
Overview of the Audits module
The flexibility of the Audits module from Workbench means that even the most unusual or previously complicated audit can be set up logically and quickly. The drudgery can be taken out of the most repetitive tasks by storing information in templates; these are then called up and used again as a base for many different audits. Building on a template ensures that all items and/or areas for audit are reviewed and cross-checked and that results are comparable. Checklist items for an audit can be recorded individually or can be grouped into categories allowing the delegation of different areas to separate auditors - or to have different auditees assigned to them (see Compiling Categories and Checklists for an Audit). All these items can be stored in the module Library so that future audits already have the foundation for a built-in checklist. In this way there is little danger that items or areas may be overlooked, especially if new auditors or assessors are appointed. Provision is also made to compile specific user defined analysis categories.
Once built, audits can be scheduled to run at any time. Planned start dates may be altered and the audit duration extended, if necessary, to suit the auditor/assessor or client. The flexibility of the system extends to the recording of results, including reporting nonconformities (assuming the Nonconformities module is licensed), and the production of reports that can take virtually any form the auditor wishes. All previously run audits are ‘frozen’ and stored in their original format (Previous Runs). They are available for viewing and reporting purposes at any time.
If auditors are required to audit sites not connected to the network, there is an offline facility whereby the audit can be checked out to a laptop. The audit can be carried out on the laptop, results entered and nonconformities flagged as needing to be raised. Once the auditor is re-connected to the network the audit can be checked back in and the results will be copied to the main database and nonconformities can be raised in the normal way.
Scheduling and Audit
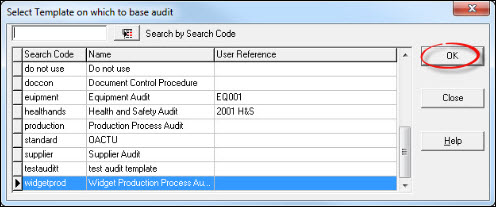
From the Audit module, select [Audit] [Schedule Audit...], locate the audit that is to be scheduled and [OK].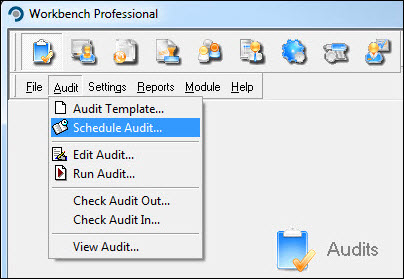
An audit template can be scheduled to run any number of times over a planned period. Select the date of the FIRST of the audits to be run, and if it is an audit that is carried out at regular intervals then select the Recurring tick box. Select the frequency of the audits, for instance 6 monthly, annually or every 2 years. The screenshot below show audit "Widget Production Process Audit" is scheduled to recur annually with the first commencing on 07/12/2015 and the last on 07/12/2017. Therefore three audits specific to this process will be created as there will also be one scheduled on 07/12/2016. Press [Save].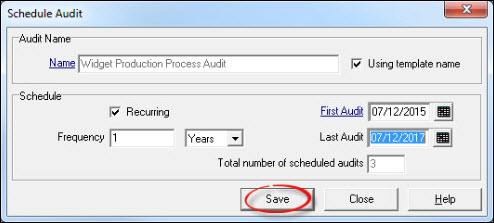
Assuming the audit dates reconcile, a summary of the Audits created appears in an "Information" box. Press [OK].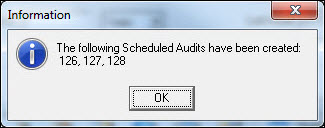
If a date is selected which does not match exactly with the frequency specified, then you will be offered the nearest date before the date originally specified. [Yes] accepts the modified date, [No] returns to the "Schedule Audit" window, allowing reselection.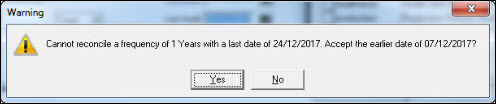
There is an option to change the name of the actual audits being created from the template. For example: - the template may be a generic departmental audit, but the plan is to schedule to audit the Engineering Department using that template. Change the name by de-selecting the box next to “Using Template Name”, and type in the name you wish to use.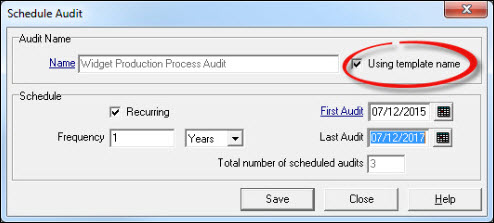
All scheduled audits whether planned, running or complete will appear in the working calendar of the nominated auditor. You can view all the audits for any auditor but selecting “All Personnel” when viewing the calendar.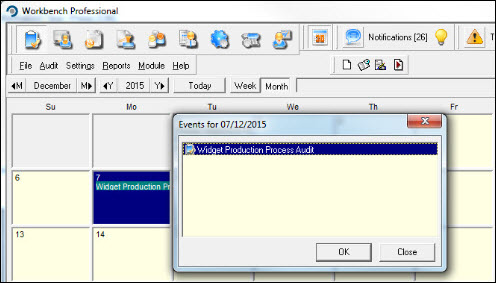
Editing an Audit
Once the audit is scheduled, the auditor will be notified that there is an audit to be run on the day the audit is due. It is possible from any of the [Edit Audit...], [Run Audit...], [Check Audit out…] and [View Audit...] menu items to see a list of all the audits in the system and to filter the list to present the audit required.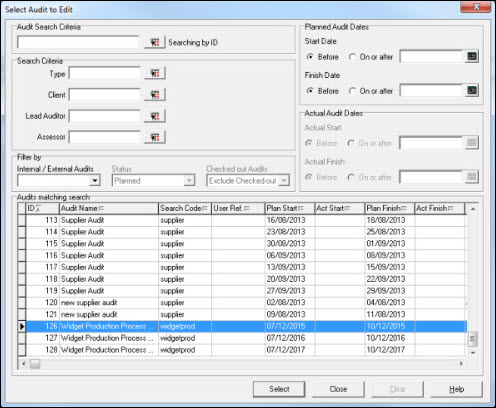
Searching to get to the audit required can be in a combination of any of the fields in the Search Criteria section and date range area of the window. Some elements will be predefined by default and cannot be changed, such as the status, if searching for audits to edit, as this will be set to Planned audits only, i.e. only a planned audit can be edited. Most Searches will exclude “Checked Out Audits” as well. The auditor must be given edit rights to the audit to be able to make any changes to the audit. The auditor will be able to edit the audit, change the Checklist items and Categories, either adding to them or deleting them, in order to customise the particular audit. More importantly, the auditor will be able to specify the auditees, if known.In addition, the auditor may want to inform the auditees as to when the audit will take place.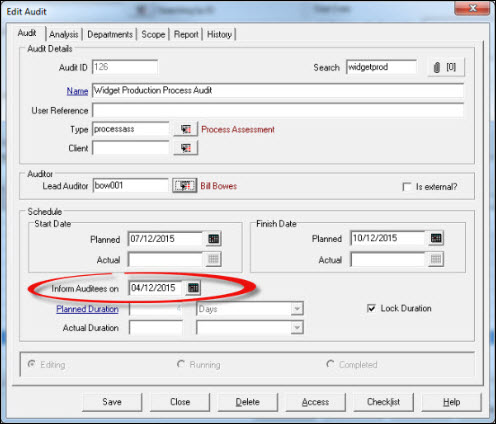
All changes will be registered in the audit history.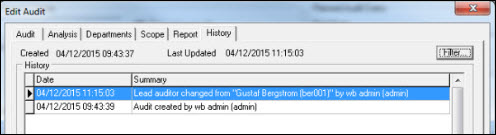
Any changes made to this audit will not affect the audit template or any other audits based on the template.
If any changes need to be made to all the audits based on the original template they must be made in the template itself and the Update scheduled audits based on this template box must be ticked.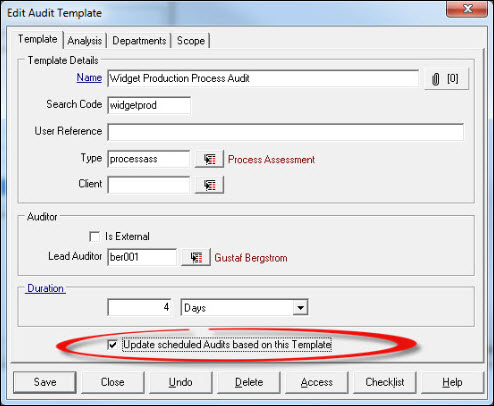
Any audits already running or checked out will not be affected by changes made to the template.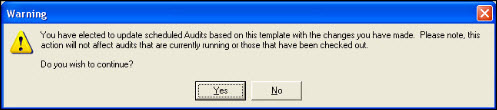
Running an Audit from the Calendar
Audits can be run either from the [Run Audit...] menu item, from the e-mail/task bar, or from the Calendar. For the purpose of this article we will use the calendar, which can be invoked via the Calendar Icon  from the Icon Bar near the top of the screen. In the monthly view, selecting the day and show day details gives all the events for the chosen day.
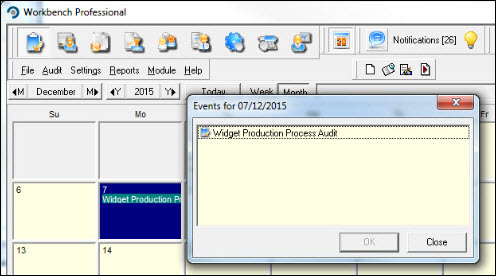
"Double clicking" or highlighting and pressing [OK] on the desired item invokes the window where you can begin to input information and complete this particular audit. In the Auditor section on the Audit tab screen check to ensure that the Lead Auditor’s name entered is correct.
Enter the correct date in the Start Date “Actual” field (if different from the default).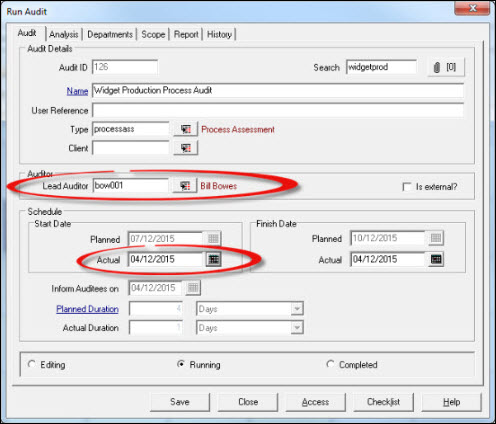
Select the [Checklist] button at the bottom of the window to bring up a list of the checklist questions.
This displays a screen similar to the template screen, but with an additional Results section. Proceed to complete this section for each checklist item. [Save] when completed.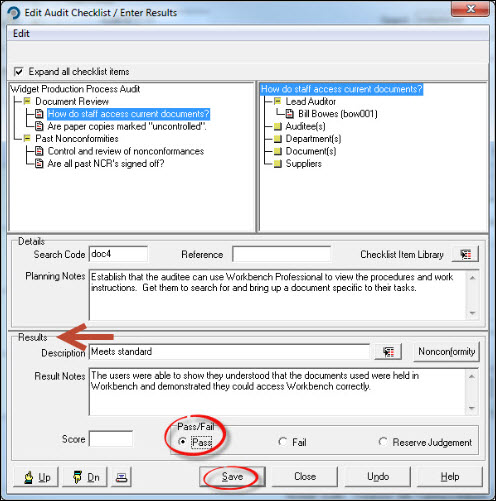
Further questions can be added at any time by selecting either the title of the audit or any category, and either using the mouse right click function or selecting the edit menu item and “Add Checklist Item” or “Add Checklist item from Library” from the dialogue box. The Auditor/Lead Auditor can also be changed at this point.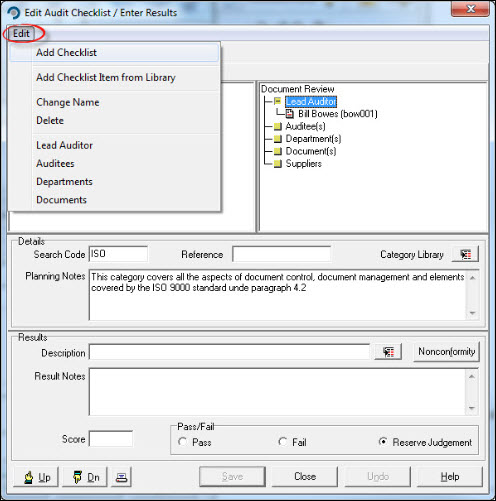
From the right hand screen, or from the dialogue box, it is also possible to identify the auditee for this question, the department involved, and the specific procedures being audited.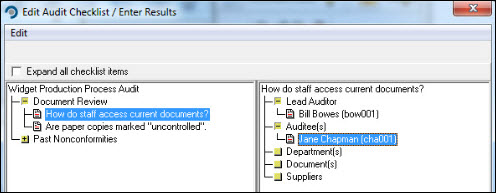
The physical aspects of the auditing can be undertaken by printing a copy of the checklist items and doing a “clipboard” or manual audit. Select the [Print]  button from the bottom of the audit screen to print out questions.
To summarise;
- Carry out the audit by choosing the audit to run and select a question to answer.
- The evidence of your questioning can be entered in the relevant Results Notes box.
- Decide on a Pass, Fail or Reserve Judgement for the question.
Selecting the [Nonconformity…] button invokes the Nonconformities Module.
NOTE: If changes are made to the audit, and then the [Undo] button is used, a warning is given that ANY and ALL of the changes since the last save will be undone. It is recommended that not only is the audit checklist saved regularly, but saving the main Audit Title Page as well.
IF THE WHOLE AUDIT IS NOT SAVED UNDO WILL DELETE CHANGES SINCE LAST TIME THE AUDIT ITSELF WAS CHANGED.
Raising a Nonconformity (NCR) from an Audit
Reporting a nonconformity from an Audit requires that the NCR module be licensed. Should Nonconformities of any type be found, they can be recorded from the "Edit Audit Checklist/ Enter Results" window by using the [Nonconformities...] button. This invokes the NCR module where the details of the issue can be recorded. If the configuration switches in the System Manager module have been enabled, the details of the Audit Checklist Item and the Results Description will be copied to the NCR Summary line, and the Planning Notes and Results Notes will be copied to the NCR Descriptions page.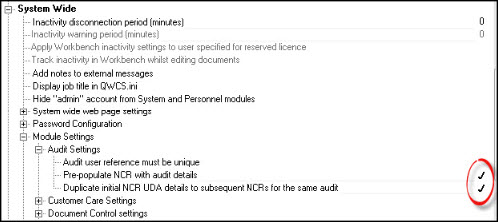
When entering the "Run Audit" window, if the Actual Date is filled in before entering Results and NCR details, then the NCR Date of Incident will be completed with the Actual Date of the Audit. If the User Defined Analysis has been configured in the NCR module, the information entered in the FIRST NCR raised from an audit will be copied across into each subsequent NCR raised during that Audit. It is IMPORTANT that the very first NCR raised has the information completed otherwise each subsequent NCR will not have any UDA information entered.
Completing an Audit
If required, a composite text document, or Audit Final Report, can be entered into the [Report] tab. This needs to be done BEFORE marking the audit as complete.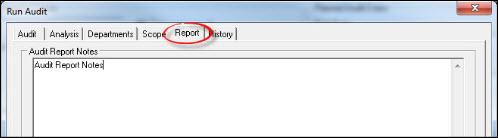
Once the required checklist items have been answered, the audit can be closed or “completed”. This does not require that any Nonconformities that were raised be closed out. It will require a password as a signature and once closed the audit becomes view only.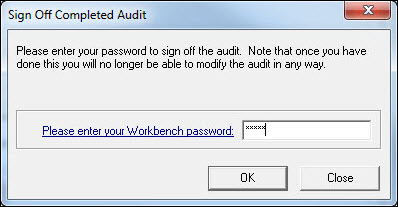
Any Nonconformity raised will be visible from the audit checklist results screen by selecting the title of the audit, and the number of Nonconformities raised against an audit will be highlighted in the top right hand corner of the Checklist screen. If there are any Nonconformities which are still open then the light bulb indicator will be yellow. When the NCR has been completed and closed off, the light bulb will turn white.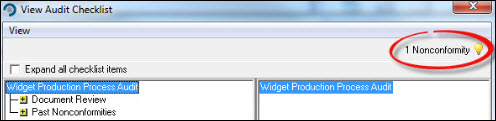
Adding attachments to Audits
It may not be possible to enter all the change information in the results box when completing the audit. Actual evidence in the form of incorrect or outdated forms etc. may be needed as part of the audit result. This information can be added to an audit using the attachments capability. Attaching an MSWord document as the Final Report is an option to the internal audit report.
From the Run Audit window press the attachments button 

Selecting the [New] button activates the lower section of the window, where the attachment or file detail should be entered. Search for the relevant file, by selecting the browse button, and give it a title, and select [Save]. Repeat for each file to be attached to the Audit.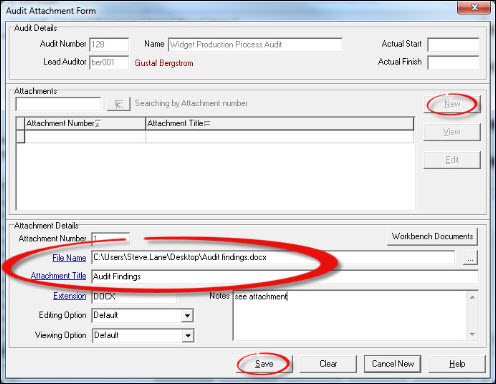
NOTE: Any attachments need to be made BEFORE marking the audit as complete.